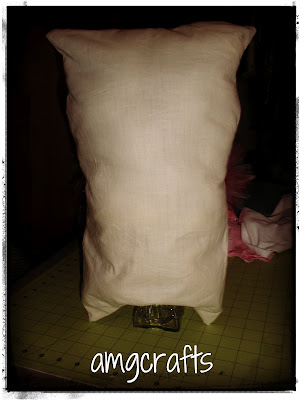
A quick look on Pinterest for DIY dress forms came up with a lot ideas for using duct tape and an actual person to make a form. And while I do have a toddler boy around the house something makes me think he would not be still enough to make a duct tape shape of him! However I did see one link for a dress form pin cushion that gave me the idea that I could just try to sew my own form.
First step was a trip to Walmart (love that it's less than 5 minutes from my house and mine carries by the yard material!) for some muslin (2 yards, 3.98). While I was there I also grabbed a bag of stuffing (3.96ish). I didn't need it, but I way overestimated how much I would use and didn't want to deplete my stash at home (definitely wouldn't have). I also ended up grabbing a 18 month onesie on sale for $1.50.
I laid out the muslin folding it in half twice. If it would've been a patterned piece of material I would have had right sides together... I traced half the onsie on (so I would be more likely to end up with mirrored sides) with a disappearing ink pen.
I cut it out while still folded and laid it out flat to pin.

For this first dress form I had to go with the glass vase because my bottom opening was not big enough.
I was excited enough about how it turned out that I made another one up soon after the first. Since I followed no pattern the second one turned out slightly different of course. I left a big enough opening to fit the wooden candle holder in for a base and I actually opted to put some velcro on the hole to help secure it onto the candlestick. I have to go back and do that with the first one, because I like how it works. I can still take the body off the base if I want/need to do something different.
And the finished, dressed products! I think they will work quite well to display some tutus at my next craft show.


 Crafty Scrappy Happy


genious!!! whata clever idea!! Thanks for sharing at uncommon! ;) Bonnie
ReplyDeleteLOVE this idea!!!! Brilliant!!!
ReplyDeleteThanks so much for sharing this at The DIY Dreamer.. From Dream To Reality!