Here's how I did it...

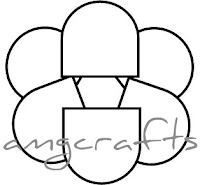
First I went to Insert Shape in Microsoft Word 2007 and chose the Flowchart: Delay shape. I copied that so I had a total of six "petals" and rotated them so they looked (sort of) like petals. I selected them all and grouped them. (Never "grouped" before in Word? Select all your pieces by holding shift as you select each one, then right click, choose the grouping option and then group from the menu).
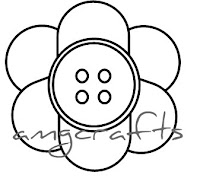
 Next I used Insert Shape again and picked the round shape to make my button. I started with the biggest circle, copied/pasted/re-sized the second circle just a bit smaller to make the "ridge" of a button. I inserted another circle the size of the button hole and then copied/pasted/moved 3 times to get four holes. When I had the button as I liked it I selected all the button shapes and used the group function again. (The grouping function makes it easier to move everything around without losing your arrangement.)
Then I moved my button piece over my petals. Once it was positioned the way I wanted I selected both pieces and used the group option for a third time to make it all one piece. I also changed the weight of the lines so that it would be thicker/work better for a stamp. To change the line weight I selected the pieces (each separate piece needs to be highlighted, not just the group) then under format go to shape outline then weight.
My next task was to take out all the "lines" between the petals as they weren't working for the look I wanted. I don't have Photoshop (and at this point in my project didn't have any similar software) so I copied and pasted my flower into Paint.
In Paint I used the eraser tool (and zoom) to erase out the lines that I didn't like. I also used the paintbrush tool to draw my threads through the button holes. Finally I added the text that I am going to use with my custom stamp (not pictured). Then I used Save As to save it as a JPG.
At this point I couldn't figure out in Paint how to fix the dpi (dots per inch- I think) to match what the stamp website wanted for uploads. No matter what I increased, it wouldn't change the dpi from 92 (they want 300). So I ended up downloading Gimp (free!) and basically redoing everything starting with erasing the lines (which I ended up liking better with Gimps eraser tool/zoom options anyway).
Then I decided to play around a little with the flowers and some color... and played my way right into a the fun banner for my blog! Too bad I already ordered the business cards or I would've totally used my own button flowers instead of the sites template!


I think they are really fun! Maybe my blog should get a button next?
Linking up at the following parties:


Thanks Kadie!
ReplyDelete